
In medical science and nursing care, bandaging is a highly fundamental and critical skill. While it may superficially appear to be just wrapping a piece of cloth or gauze over a wound, it is underpinned by specific scientific and physiological principles. Proper bandaging accelerates the patient’s recovery, halts bleeding, and mitigates the risk of infection. Conversely, incorrect application can obstruct blood circulation, leading to severe complications such as tissue damage or necrosis.
For any competent healthcare professional or first aider, possessing an in-depth understanding of the general principles of bandaging is indispensable. This article comprehensively discusses the scientific foundation, correct application techniques, precautions, and associated clinical considerations of bandaging.
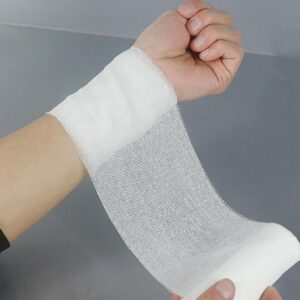
General Principles of Bandaging
The Primary Objectives and Scientific Basis of Bandaging
A bandage is not merely used to cover a wound; its clinical applications are multifaceted. The primary objectives include:
- Protecting the Wound: Shielding the exposed wound from external dust, dirt, and pathogens to significantly reduce the risk of infection.
- Controlling Haemorrhage: Applying direct pressure over the wound site to stop active bleeding from compromised veins or arteries.
- Immobilising the Limb: Keeping the affected part completely still in cases of sprains, fractures, or muscular trauma, thereby preventing the injury from exacerbating.
- Reducing Swelling: Applying uniform compression to the injured area to control and minimise oedema (swelling).
- Securing Dressings: Holding medicated gauze pads or primary dressings firmly in their correct anatomical position.
Key Rules and Scientific Principles of Bandage Application
When applying any type of bandage, certain classical rules and clinical principles must be strictly adhered to. These protocols ensure patient safety, comfort, and optimal healing.
1. Patient Preparation and Positioning
Before commencing, the patient should be placed in a comfortable and safe position, whether seated or lying down. The body part to be bandaged must be well-supported. To minimise swelling, the limb should ideally be elevated slightly above the level of the heart. The nurse or clinician should stand directly facing the patient to closely monitor their facial expressions and responses to pain during the procedure.
2. Distal to Proximal Application
Always apply the bandage starting from the furthest part of the limb (distal) and work towards the centre of the body or the heart (proximal). For example, when bandaging an arm, begin near the fingers and progress upwards towards the elbow or shoulder.
Scientific Rationale: This technique facilitates venous return—the process of blood flowing back to the heart through the veins. Bandaging in the opposite direction forces blood to pool in the lower extremities, which can drastically increase swelling and vascular pressure.
3. Protecting the Skin from Friction
Direct bandaging should be avoided on areas where skin surfaces naturally touch one another (such as between two fingers, toes, or behind the ear). To prevent friction and subsequent skin breakdown, these surfaces must be separated using a small amount of cotton wool or a sterile gauze pad. Providing extra padding over bony prominences is also highly recommended to prevent pressure sores.
4. Applying Correct Pressure and Ensuring Circulation
Uniform pressure must be maintained throughout the bandaging process. Wrapping the bandage too tightly can restrict arterial blood flow, potentially causing ischaemia. Conversely, if wrapped too loosely, the bandage may slip, leaving the wound exposed to environmental contaminants.
Important Note: Capillary Refill Test
To verify that the bandage is not excessively tight, perform a capillary refill test by pressing firmly on the patient’s fingernail or toenail. If the normal healthy pink colour does not return within two seconds after releasing the pressure, local blood circulation is compromised. In such instances, the bandage must be loosened immediately.
5. Leaving Fingers or Toes Exposed
When bandaging an arm or leg, the tips of the fingers or toes should not be completely covered, unless they are the site of the direct injury. Leaving the digits exposed allows healthcare providers to easily monitor peripheral blood circulation, observe changes in skin colour (checking for cyanosis or severe pallor), and assess skin temperature.
6. Avoiding the Use of Wet Bandages
A wet bandage must never be applied to a patient. As wet cloth or gauze dries, the material naturally shrinks. Consequently, it can exert progressive, excessive pressure on the patient’s limb, effectively acting as a tourniquet and cutting off vital blood circulation.
7. Correct Direction of Turns and Termination
The bandage roll should be held securely in the palm of the hand with the drum facing upwards, allowing it to unroll smoothly onto the skin. Generally, the bandage is wrapped in a clockwise direction. To initiate the process, lock the bandage in place with at least two circular turns around the narrowest part of the limb. The terminal end must be fastened using a safety pin or medical adhesive tape, ensuring the fastening mechanism does not rest directly over the wound or create a pressure point on the skin.
Step-by-Step Bandaging Procedure
Healthcare professionals follow a highly systematic procedure to execute a flawless bandage application:
- Assessment: First, critically evaluate the size, depth, and location of the wound, alongside the patient’s overall health condition. Select the appropriate material (e.g., conforming gauze, elastic crepe bandage) tailored to the specific nature of the injury.
- Infection Control: Before handling the bandage, perform strict hand hygiene with soap and water or an alcohol-based sanitiser, and don examination gloves. The wound and surrounding skin must be thoroughly cleaned with an appropriate antiseptic solution.
- Gentleness: Injured and inflamed tissue is extremely sensitive. Never rush the procedure or use rough handling during the application or removal of any bandage.
- Patient Education: Instruct the patient on how to keep the bandage clean and dry at home. Furthermore, proactively warn them about potential danger signs, such as severe throbbing pain, numbness, or extremities turning blue, which warrant immediate medical attention.
- Documentation: In a clinical setting, it is mandatory to accurately record the type of bandage used, the anatomical site of application, the time, and the current clinical condition of the wound in the patient’s medical notes.
Signs of Correct vs. Incorrect Bandage Application
| Clinical Criteria | Correct Application | Incorrect / Faulty Application |
| Skin Colour | Fingertips/toes remain a healthy pink. | Fingertips/toes turn bluish (cyanosis) or abnormally pale. |
| Temperature | The bandaged limb maintains a normal, warm temperature. | The extremity feels unnaturally cold to the touch. |
| Sensation | The patient experiences support with no unusual discomfort. | The patient reports severe pain, tingling (pins and needles), or numbness. |
| Positioning | The bandage remains firmly and neatly in place. | The bandage becomes loose, unravels, or slips with slight movement. |
Rules for Bandage Removal and Subsequent Observation
The method of removing a bandage is just as critical as its application. Yanking, tearing, or pulling forcefully on the bandage is strictly prohibited, as this can easily traumatise the healing wound. Instead, the folds should be gently loosened and gathered into a soft mass in the palm of your hand. Carefully unwrap the entire bandage by passing the gathered mass fluidly from one hand to the other.
Once removed, closely inspect the underlying skin and the wound bed. If any abnormal redness, foul-smelling purulent discharge (pus), signs of an allergic reaction, or skin maceration (whitening and softening from excess moisture) is observed, medical advice must be sought promptly.
Tip Box: The Correct Technique for Holding a Bandage Roll
Always hold the bandage roll (the drum) facing upwards as you unroll it directly onto the limb. This simple ergonomic technique significantly reduces the risk of the bandage slipping out of your control, falling to the floor, and becoming contaminated, whilst making it noticeably easier to apply consistent, even pressure.
Frequently Asked Questions (FAQs)
1. Should a bandage be tied very tightly?
No. A bandage should be firm enough to securely hold the underlying dressing and provide gentle structural support, but never so tight that it impedes blood circulation. If you can comfortably slip one finger underneath the edge of the bandage without force, the pressure is generally considered correct.
2. Why are the fingertips or toes left exposed when bandaging a limb?
Exposing the digits provides a vital “window” to assess the patient’s peripheral vascular status. It allows clinicians to perform the capillary refill test and visually monitor for adverse changes in skin temperature or colour, ensuring the limb remains healthy.
3. What should I do if blood seeps through and soaks the bandage?
If blood strikes through the initial bandage, do not remove it. Removing the original dressing can disrupt the delicate blood clotting process. Instead, place a fresh sterile pad directly over the blood-soaked area and wrap another bandage tightly on top to apply additional compressive pressure.
4. What type of bandage is best suited for joints?
For highly mobile joints (such as elbows, knees, or ankles) and angular anatomical areas, using an elastic crepe bandage or employing the ‘figure-of-eight’ bandaging technique is highly effective. This conforms to the joint and provides stability without completely restricting the limb’s natural range of motion.
5. What precautions should be taken when securing a bandage with a safety pin?
A safety pin should never be secured directly over the wound bed, directly on a bony prominence, or in any weight-bearing area where pressure might cause pain or tissue damage. In modern practice, using medical adhesive tape is widely considered a safer and more comfortable alternative.
Key Takeaways
- The primary clinical objectives of bandaging are to protect the wound from pathogens, control haemorrhage, and immobilise the injured extremity to accelerate natural healing.
- Always bandage from the furthest part of the body (distal) towards the centre (proximal) to actively support normal venous blood flow and prevent oedema.
- To prevent friction-induced skin damage and pressure ulcers, soft padding must be used between adjacent skin surfaces and over all bony prominences.
- Fingertips or toes must remain exposed after bandaging to continuously verify adequate blood circulation via the capillary refill test.
- Never apply a wet bandage; as the fabric dries, it will inevitably shrink and can severely constrict blood circulation, acting like a tourniquet.
- Maintaining strict aseptic technique and employing a gentle, compassionate touch during both application and removal remain the paramount responsibilities of any healthcare provider.