Managing a patient with a dangerously high body temperature requires swift, effective, and evidence-based clinical interventions. While antipyretic medications are the first line of defence against fever, physical cooling methods are often required for hyperthermia, heatstroke, or refractory fevers. The procedure of cold sponge—often referred to interchangeably in clinical settings as tepid sponging—is a foundational nursing skill designed to lower a patient’s core body temperature safely.
When executed correctly, this procedure leverages the physiological principles of heat transfer to provide rapid relief. However, an incorrect technique can induce shivering, which paradoxically raises the core body temperature and exacerbates the patient’s condition.

What is Cold Sponging and How Does It Work?
Cold sponging is a therapeutic nursing intervention that involves applying water to a patient’s skin to reduce body temperature. The mechanism relies heavily on two primary methods of heat loss:
- Conduction: The direct transfer of heat from the patient’s warm skin to the cooler water and sponge cloths.
- Evaporation: As the water on the surface of the skin absorbs body heat, it transforms into a vapour. This phase change extracts a significant amount of latent heat from the body, resulting in a systemic cooling effect.
The Rationale Behind Target Areas
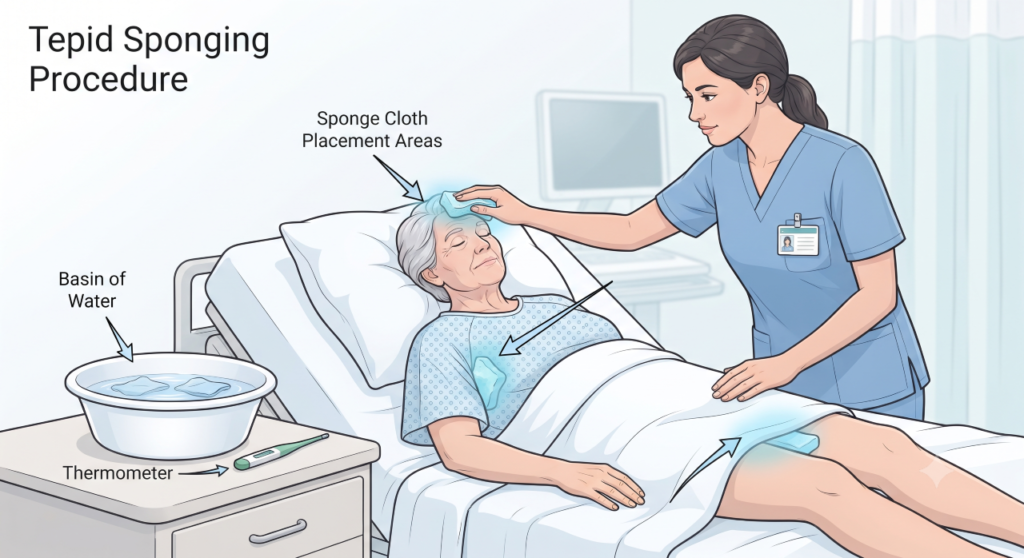
During the procedure, damp cloths are strategically placed in the axillae (armpits) and the groin. These specific anatomical regions house major superficial blood vessels, namely the axillary and femoral arteries. By cooling the blood as it flows through these major vessels, the chilled blood circulates back into the body, effectively lowering the overall core temperature at a much faster rate.
Indications and Contraindications: When is it Appropriate?
Before initiating the procedure, a nurse must carefully assess whether a cold or tepid sponge is clinically appropriate for the patient.
Indications:
- Extremely high fevers (typically over 104°F or 40°C) that do not respond to paracetamol, ibuprofen, or other antipyretics.
- Heat-related emergencies, such as heat exhaustion or heatstroke.
- Neurological fevers resulting from head trauma or brain injury, where the hypothalamus (the body’s thermostat) is impaired.
Contraindications:
- Patients who are already shivering or experiencing chills.
- Individuals with compromised peripheral circulation (e.g., severe peripheral arterial disease).
- Neonates and very young infants, unless specifically ordered by a paediatrician, due to their inability to regulate body temperature effectively.
Essential Equipment for the Procedure
Gathering all necessary equipment beforehand ensures the procedure runs smoothly without leaving the patient exposed. A standard clinical setup includes:
- A large basin of tepid water (typically 80–90°F or 27–32°C for fever, or colder for specific heatstroke protocols).
- A jug of cold water and a basin of ice cubes (to regulate the water temperature as it warms up).
- A bath thermometer to maintain the correct water temperature.
- A Mackintosh (waterproof rubber sheet) and a cotton draw sheet to protect the bed linens.
- Six soft sponge cloths or flannels.
- One large bath towel and one face towel.
- A vital signs tray (including a clinical thermometer).
- An ice cap with a cover (optional, applied to the head to prevent cerebral congestion).
- A bucket or receptacle for discarded water.
Important Note on Outdated Practices: Older nursing manuals often recommended applying surgical spirit or rubbing alcohol to the patient’s back after sponging to accelerate cooling. Modern medical guidelines strongly advise against this. Alcohol is rapidly absorbed through the skin, which can cause toxicity (especially in children). Furthermore, it evaporates too quickly, causing severe shivering that spikes the core body temperature.
Step-by-Step Procedure of Cold Sponge
The physical application of the sponge must be methodical, gentle, and continuously monitored. The procedure is broadly divided into three phases.
Phase 1: Patient Preparation and Assessment
- Hand Hygiene: Wash hands thoroughly using standard infection control protocols.
- Assessment: Check the patient’s baseline vital signs, paying close attention to temperature, pulse, and respiration (TPR).
- Preparation: Explain the procedure to the patient to reduce anxiety and gain consent. Ensure the room is comfortably warm and free from draughts.
- Bed Protection: Place the Mackintosh and draw sheet under the patient to keep the mattress completely dry.
- Water Preparation: Mix the water with ice cubes in the basin, verifying the temperature with a bath thermometer. Soak the sponge cloths in the water.
Phase 2: Execution of the Cold Sponge
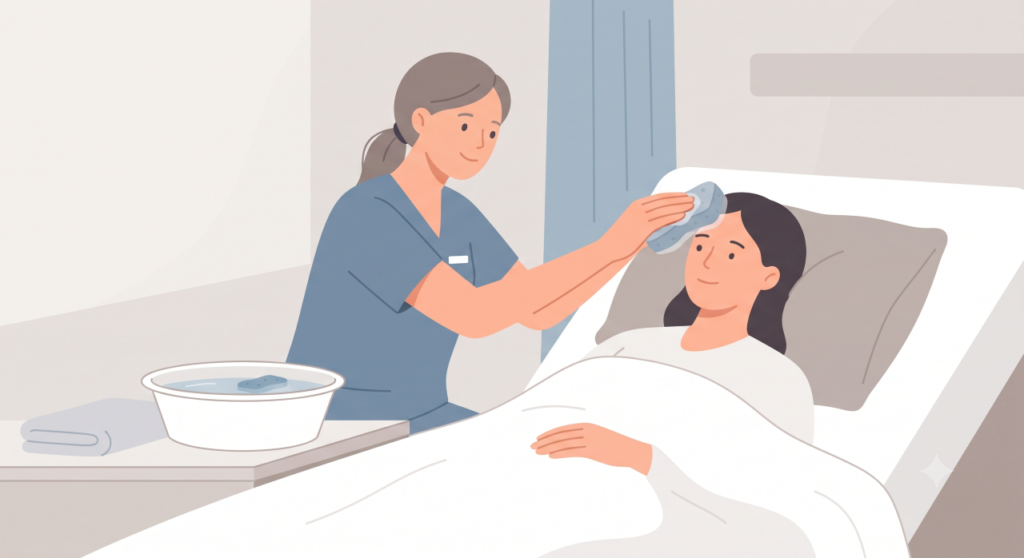
- Strategic Placement: Wring out two sponge cloths so they are damp but not dripping. Place one in each axilla and one in each groin crease. These must remain in place throughout the procedure, changing them as they become warm.
- Facial Care: Place a dry face towel under the patient’s head. Gently sponge the face and pat it dry immediately.
- Upper Extremities: Sponge the neck and the right arm, using long, smooth strokes from the shoulder down to the fingertips. Do this for approximately 3 minutes. Repeat the same process on the left arm.
- Torso: Sponge the chest and abdomen gently for 3 minutes. Avoid vigorous rubbing, as friction generates heat.
- Water Maintenance: Continually check the water temperature. Change the water or add ice if it becomes dirty or too warm.
- Lower Extremities: Cover the upper half of the patient’s body with a light sheet to prevent overexposure and chilling. Expose the lower half. Sponge the right and left lower limbs for 3 minutes each, using long, downward strokes.
- Posterior Care: Carefully turn the patient onto their side, bringing them safely towards the edge of the bed. Sponge the back and buttocks using long strokes for 3 minutes.
Phase 3: Post-Procedure Care and Documentation
- Drying: Remove all damp sponge cloths from the axillae, groin, and body. Discard them in a designated receptacle. Gently pat the entire body completely dry with a clean bath towel.
- Bedding Management: Roll and remove the wet Mackintosh and draw sheet.
- Patient Comfort: Replace the patient’s gown with dry, lightweight clothing. Remove any damp bath blankets and cover the patient with a light sheet. Position them comfortably in bed.
- Hydration: If the patient is fully conscious, not nauseous, and the clinical condition allows, offer hot or warm drinks to comfort them and maintain hydration.
- Clean Up: Remove all equipment, clean and disinfect reusable items, and wash hands thoroughly.
- Re-evaluation: Check the patient’s temperature 20 to 30 minutes after completing the procedure.
- Documentation: Record the intervention in the nurse’s charting system, noting the pre- and post-procedure vital signs, the duration of the sponge, and the patient’s tolerance.
Monitoring for Complications
During the procedure of cold sponge, the clinician must remain vigilant for adverse physiological reactions. The procedure must be halted immediately if the patient exhibits any of the following:
- Shivering: Muscle tremors generate metabolic heat, entirely defeating the purpose of the cooling sponge.
- Cyanosis: A bluish discolouration of the lips or nail beds indicates severe vasoconstriction and compromised oxygenation.
- Pulse Changes: A sudden, weak, or highly irregular pulse can indicate cardiovascular stress or shock.
- Mottling: Patchy, discoloured skin resulting from extreme vascular constriction.
Frequently Asked Questions (FAQs)
1. What is the difference between a cold sponge and a tepid sponge?
While often used interchangeably, a cold sponge utilizes water mixed with ice (typically below 20°C) and is reserved for extreme hyperthermic emergencies like heatstroke. A tepid sponge uses lukewarm water (27–32°C) and is the standard practice for reducing fever caused by illness, as it prevents sudden shivering.
2. Why do we use long, smooth strokes instead of rubbing during a sponge bath?
Vigorous rubbing creates friction on the skin, which generates kinetic heat. Long, smooth strokes allow the water to rest on the skin’s surface just long enough to evaporate and draw heat away from the body without creating unnecessary friction.
3. Why must we place wet cloths in the groin and armpits?
The axillary and femoral arteries are large blood vessels that run very close to the surface of the skin in the armpits and groin. Cooling the blood at these superficial points allows chilled blood to circulate throughout the body, dropping the core temperature rapidly.
4. How long should the entire sponging procedure last?
The entire procedure should generally take between 20 to 30 minutes. Sponging for too long can lead to overcooling (hypothermia) or cardiovascular stress.
5. What should I do if the patient begins to shiver violently?
Stop the procedure immediately. Cover the patient with a light blanket to stop the shivering mechanism. Document the reaction and notify the attending physician, as alternative cooling methods or medications may be required.
Key Takeaways
- Core Purpose: The procedure of cold sponge utilizes the principles of conduction and evaporation to safely lower a dangerously high body temperature.
- Strategic Cooling: Placing damp cloths in the axillae and groin targets major superficial arteries, expediting systemic cooling.
- Avoid Outdated Methods: Never use surgical spirit or rubbing alcohol on the skin during a cooling sponge, as it poses a severe risk of toxicity and extreme shivering.
- Vigilant Monitoring: The procedure must be stopped immediately if the patient displays signs of shivering, cyanosis, or a weak pulse.
- Proper Documentation: Always reassess and record the patient’s temperature 20 to 30 minutes post-procedure to evaluate the clinical efficacy of the intervention.